

Home improvement nightmare
Pandora's box
The story of our guest bed & bath rooms remodel

May 28, 2016
The new bathroom will be over the part of the house that was built on a slab. Where as the guest bedroom is over a basement. This means we need to bust up the old slab to get the new drain lines in and tap into the old drain line.
This is a rare occasion when it is a good thing this house was not built right and never passed a building inspection. There should have been rebar (short for re-enforcing bar) in the concrete to strengthen it which also makes it very hard to break up. Thankfully for us there was no rebar in the concrete and a few smacks with a sledge broke it up nicely. First we cut the concrete with a diamond blade, it is really just diamond coated, on the circular saw. I bought the blade cheap at a garage sale knowing this was coming. Neal ran the saw on the lines that we made on the floor to map out the shortest distance to connect the new sink, shower and toilet drain lines to the old line that was under the slab. Even though I followed behind my husband with a shop vacuum as he cut, dust was everywhere. Of course we had dust masks on, but we still had to stop now and then to clear out the air. We also had a fan blowing out of the room to the outside and another fan at the door into the room to keep the dust from going into the rest of the house. This was only marginally effective. When we took the dust masks off, there was dust on our faces and dust all over the house. Oh well, everything can be cleaned. It was not a fun day. Memorable but not fun. The shower later sure felt good though.
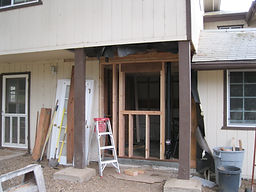
The photo below is during the cutting of the slab.
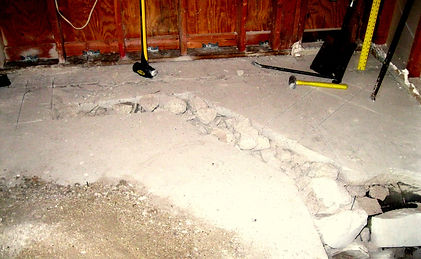
June 3,

The photo above is the old drain line the new plumbing would connect to. It was about 2 feet down. Tapping into this line saved us from having to cut into the basement wall which could have cascaded into a disaster.
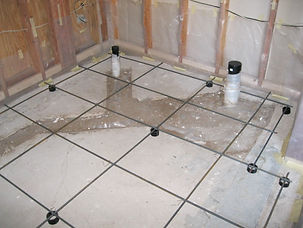
The photo on the left is of the filled trench for the new drain line. The shower drain is in the left upper corner and the larger drain on the right is for the toilet. The rebar has been placed on 1 inch high legs of ABS plumbing scraps that have groves cut in the top to hold the rebar in place. This insures that the rebar will be in the bottom 1/3 of the new slab that will be poured over the entire area in order to raise it up to the same height as the bedroom floor. Why was it lower before? We have no clue.
June 6,
The ground where the wheelbarrows will travel from the concrete truck to the new construction is very popular with gophers. Having a wheelbarrow loaded with concrete fall into a gopher tunnel would not be good, so panels of the old siding were used to make a path. Then there was the problem of getting the wheelbarrows over the foundation wall and dumping the concrete where it was needed. Hence, the ramp. Beautifully designed by my engineer husband. Elephants could dance on this and it would still stand. However, it all came apart with a couple of screws as the concrete reached the outside wall.


June 11,
Concrete has a very short working time before it starts to set up. Even on a cool (mid fifty degree) and over cast day, concrete will start to harden in minutes. So how do you move 1 1/2 cubic yards into place while smoothing it out at the same time?
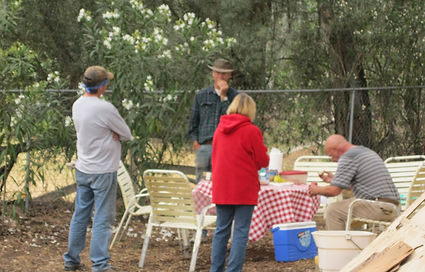
You call in your friends of course! You also provide LOTS of food and beverages and hope with fingers crossed, that they are still your friends afterwards.
This is when you find out who your true friends are!!!! The guys made about 30 trips from the truck to Neal and his helpers for compacting and smoothing. Another lady managed the food table. What was I doing? I had the hardest job of taking the photos!

The completed new concrete sub-floor of the new guest bath. Later mortar and tile will be added.
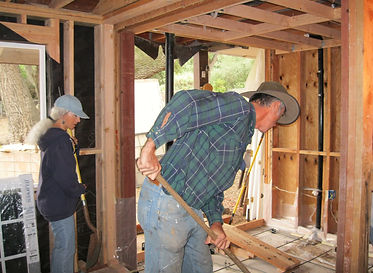
Framing begins on the new exterior bath room wall
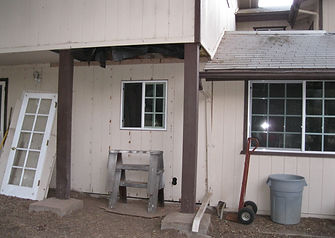
The new bathroom window is installed and the old siding is up temporarily until we get more primed and painted.
July 13,
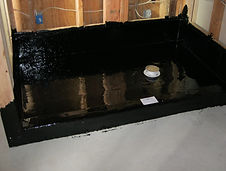
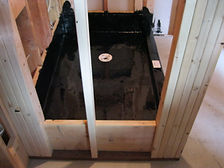
The shower pan, the base, has been hot mopped. This is one of several methods used to water proof a shower base. This is very common in southern California, but not in other areas. Why just southern California? I don't really know. Perhaps because it is what people are familiar with. We used this when we re-did our master bath nine years ago and have never had a leak. The process involves putting down a mortar base that is sloped 1/4 inch per foot to the shower drain. Then layers of roofing felt paper are layered with hot asphalt and a top coat of hot asphalt. This is not a job for home owners, so we hired this part out. It took about 5 days for the smell to completely dissipate. The photo right shows the before and after.
July 15,
Now we proceed onto water supply lines and electrical. Hot and cold water line must be run to the vanity where the faucet will be and the shower faucet and head. Only cold water is needed at the toilet. Finding a shower faucet in what I thought was a reasonable price (< $200.00) was very difficult. In a shower faucet there is a mixing valve which as the name implies mixes the cold and hot water to the desired temp. Most of these valves include a feature to balance the temperature and pressure. This prevents the screaming when someone flushes a toilet and the bather get scalded, Maximum temperature settings can also be preset to avoid burning. These are all good modern day improvements. The catch is that the valve is frequently sold separately from the trim, the pretty part that is visible. The two parts are not interchangeable between brands. After hours and hours of searching the internet for a faucet that had the style I wanted (chrome with a single modern lever), I gave up and got a basic design at Home Depot.

July 19-28,
We started off the week with a bit of a set back. After finishing the rough in of the plumbing, we pressure tested the water lines. This consists of turning the hot and cold water on and checking for leaks. And wouldn't you know it the cold water line was spraying water at a T connection all over the place. Better to find it now than after the drywall and tile are up. With all the water lines Neal has soldered over the years, this is the only time there has been a leak. So the T connection is cut out, the water drained from the lines, and new fittings put in.
Since the plumbing is done, we moved on to electrical. We first had to figure out what circuits went where, so we made a drawing of the floor plan of the entire house with all switches and outlets on it. Next we turned all the circuits off and turned them on one by one to determine what was where. Sounds simple. It should be. But not in this house. We had switches that were powered by 2 separate circuits. Ground wires in light fixtures were just cut off and even more wires that were cut off and the ends wrapped with electrical tape. We could see junction boxes between the joists above the drywall but of course not accessible. So, more demolition!!! Since all the drywall in the kitchen ceiling had to be removed to get access to the rats nest of wires (actually it was a mouse nest) since we found 2 dead ones, we got to upgrade the kitchen lights like I have wanted to do for the last 20 years. We also replaced and added lighting in the hallway. We actually have switches for the hall at both ends! Wow. And to be sure we had enough circuits for every thing, we installed a larger sub panel. This is NOT the type of work for most do it yourselfers. We have done many electrical jobs under the supervision of my father-in-law who is an electrical engineer. My husband when completely confused about a wiring circuit, would call up his dad and explain the situation. Then I would hear lots of very loud laughing from the other end of the line because he could not believe the things we found.